Homemade Keto donuts are a fantastic way to eat delicious donuts without all the unhealthy additives that store-bought donuts have. Avoid sugar, starches, white flour, and possibly e-numbers with healthy homemade keto donuts.
I usually bake these donuts for my husband as he is on the keto diet, but I also let my children enjoy them as they are pretty healthy compared to store-bought donuts.
Contents
Ingredients:
For Donuts
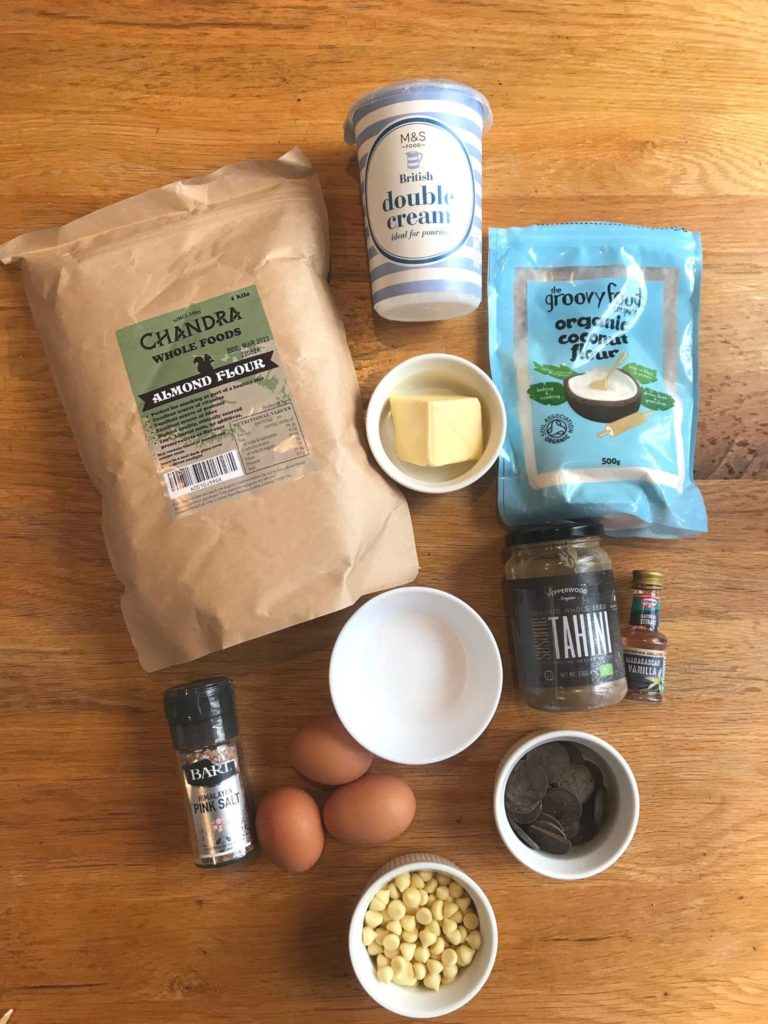
- 150 gr Almond Flour
- 110gr butter
- 300gr double cream
- 30 gr erythritol
- 1 tsp baking powder
- 1 tsp vanilla extract
- 1 tsp tahini paste
- A pinch of pink salt
For Glazing
- 200 gr of cocoa butter
- 2-3 buttons of unsweetened chocolate
- 1 tbsp of tahini.
How to avoid the donuts sticking to the plate
Once you need to remove the donuts from the tray and place them on a plate or tray, it is convenient to use a parchment baking sheet to separate the donuts from the surface, especially once they are glazed.
As I mention later, it is better to glaze the donuts on a tray and, once they are glazed, place them into another container before putting them in the fridge. The baking paper helps with a stick-free transfer
(I have tried aluminum kitchen paper without success as the donuts stuck to it, but, baking paper or parchment works a treat)
Instructions
For the Dough
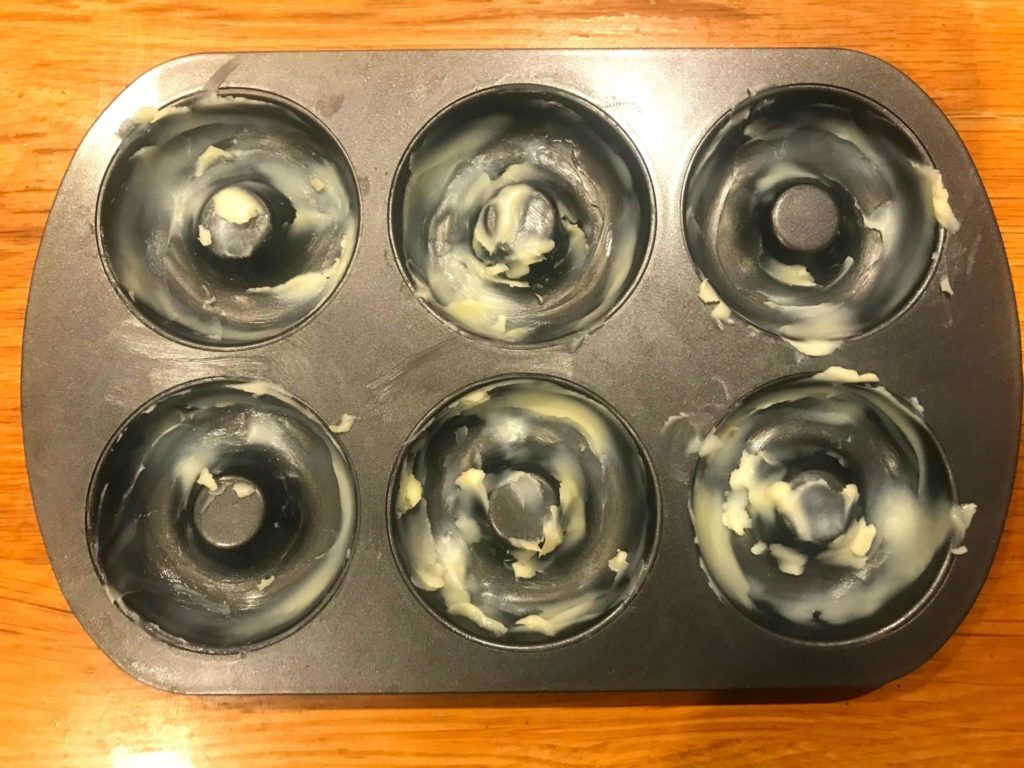
Step 1- Grease the baking tray
Grease the tray generously, covering the surfaces where the dough is going, especially around the center.
I have used regular butter, but you can use cocoa butter or even a baking spray. Some of the taste of whatever you use will find its way into the donut.
Set aside until needed.
Step 2- Whisk the egg white in a large glass bowl
Separate the egg white from the yolk, add a pinch of salt (my favorite is Himalayan pink salt), and whisk until stiff.
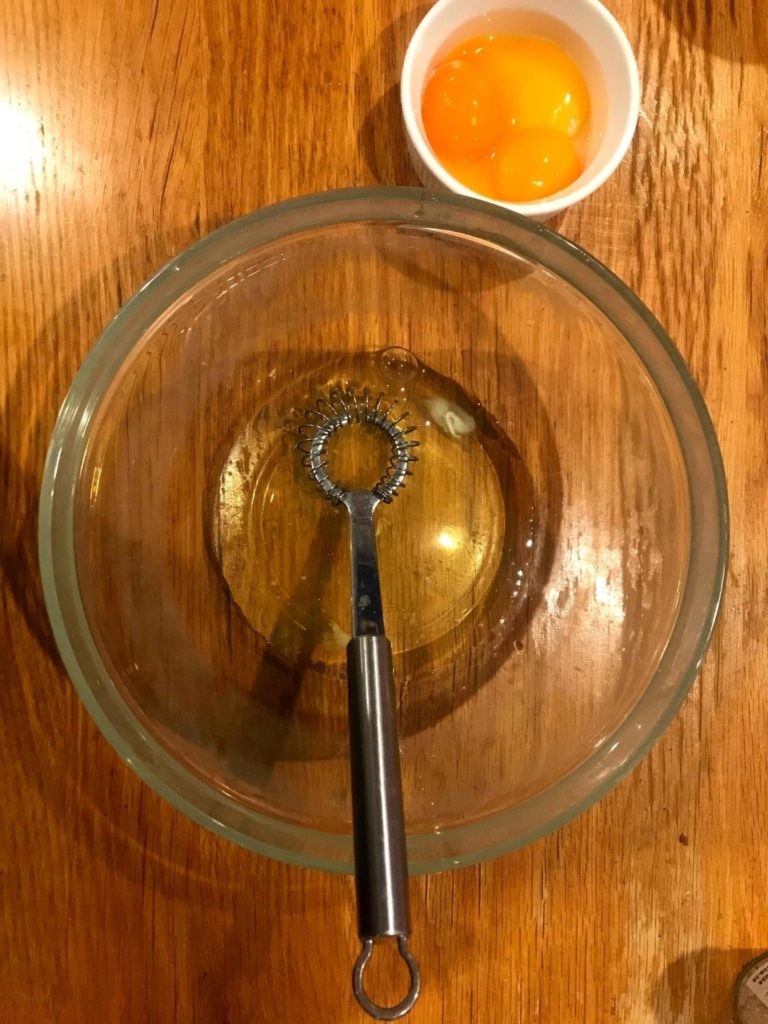
Step 3- Add the yolks
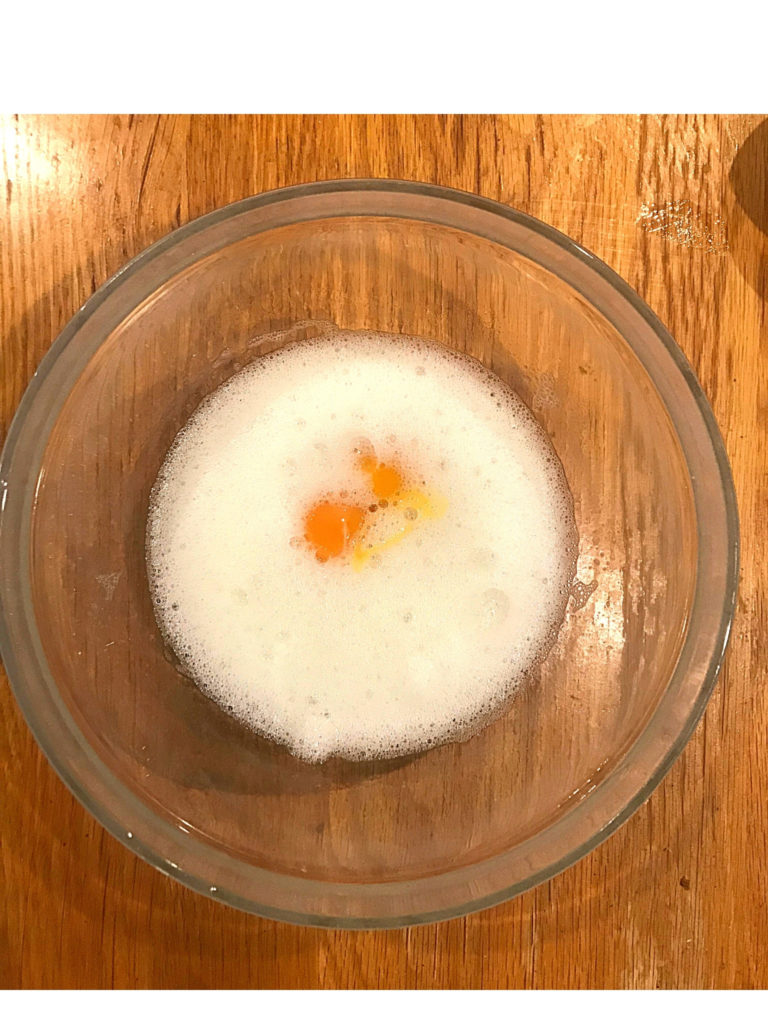
Add the yolks and whisk them until combined.
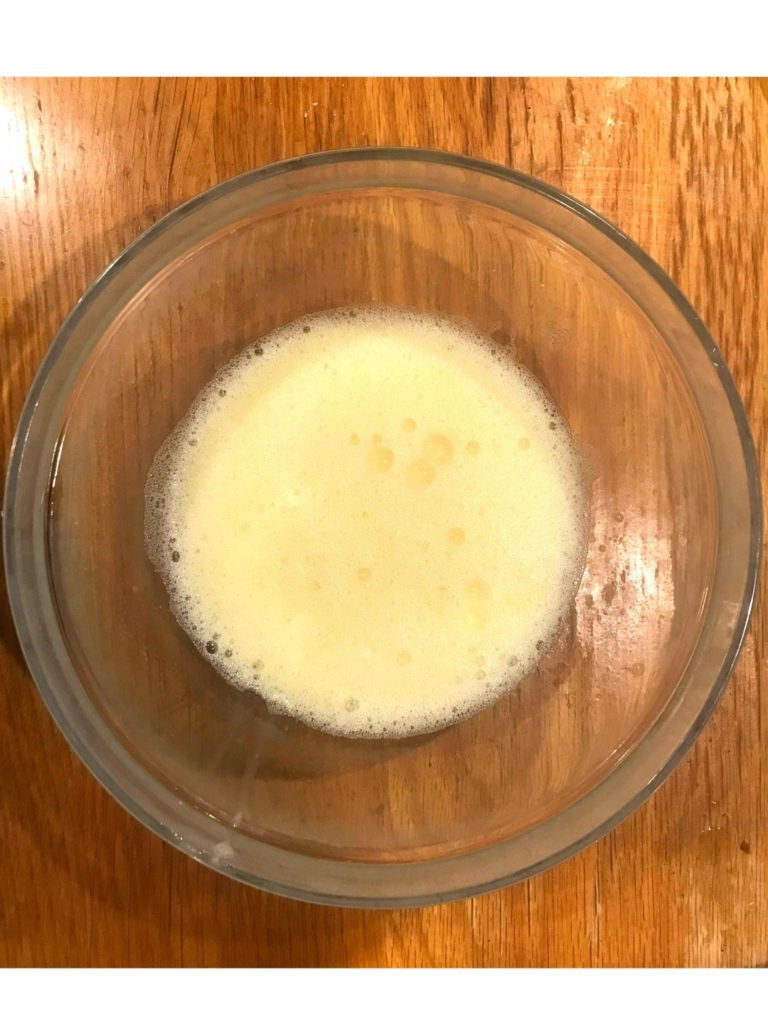
Step 4- Add the double cream and the vanilla extract.
Add the double cream and whisk until combined, then add the vanilla extract and repeat the process.
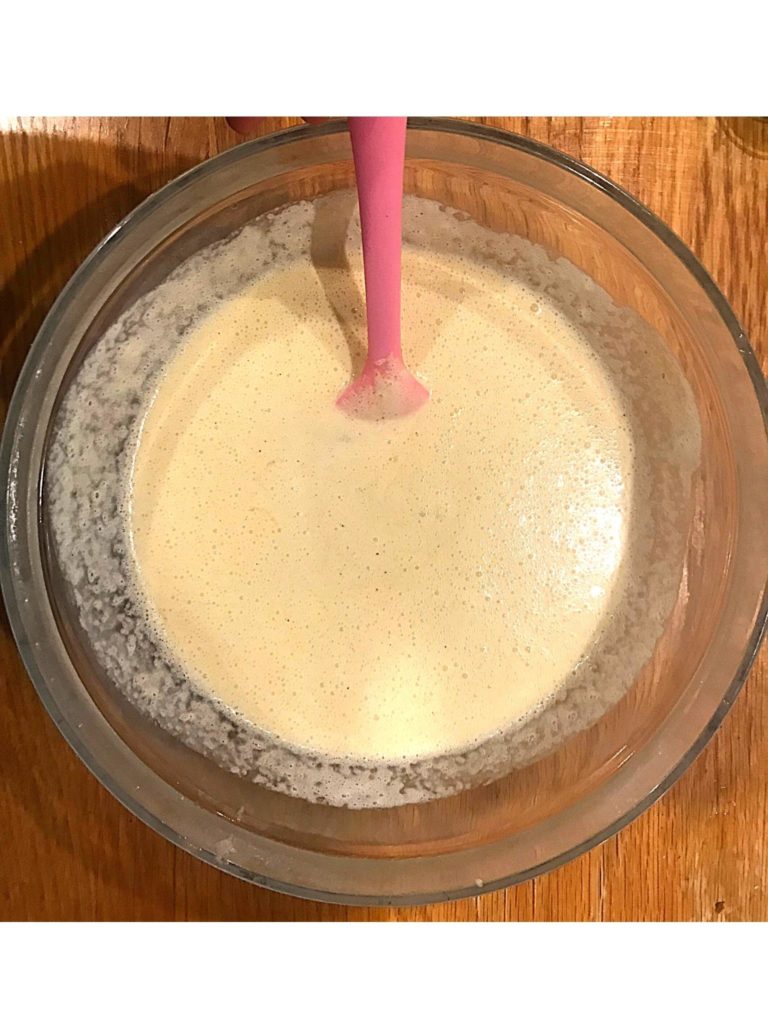
Step 5- Add the melted butter
Melt the butter in a pan on low heat. Mix in the melted butter with the cream and eggs.
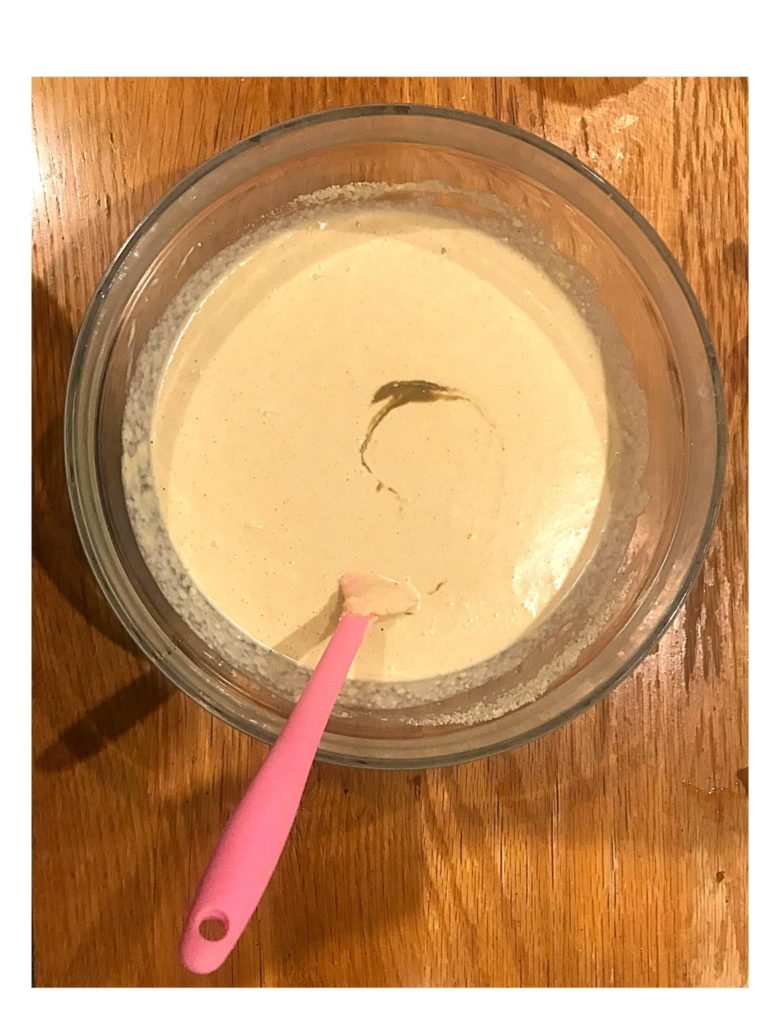
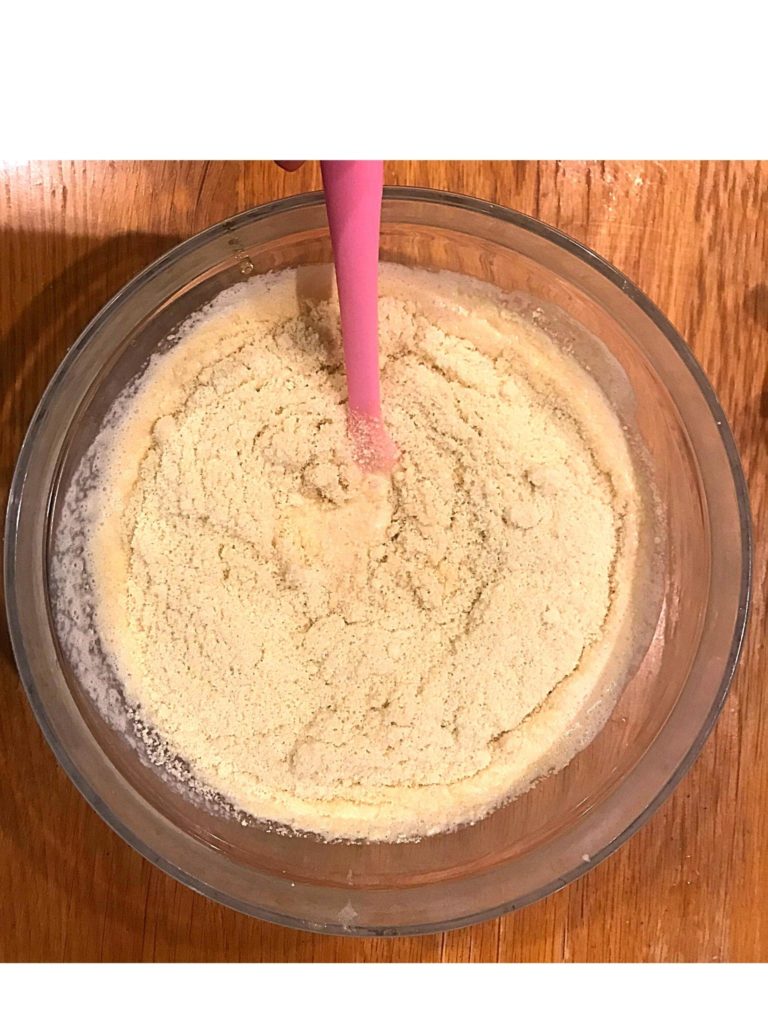
Step 6- Add the Almond flour and erythritol
Slowly add the Almond flour and keep stirring until combined. You want a lump-free smooth paste here, so keep stirring until you get it. (You’ll find it easier to add the almond flour in small amounts.)
Add the erythritol and combine.
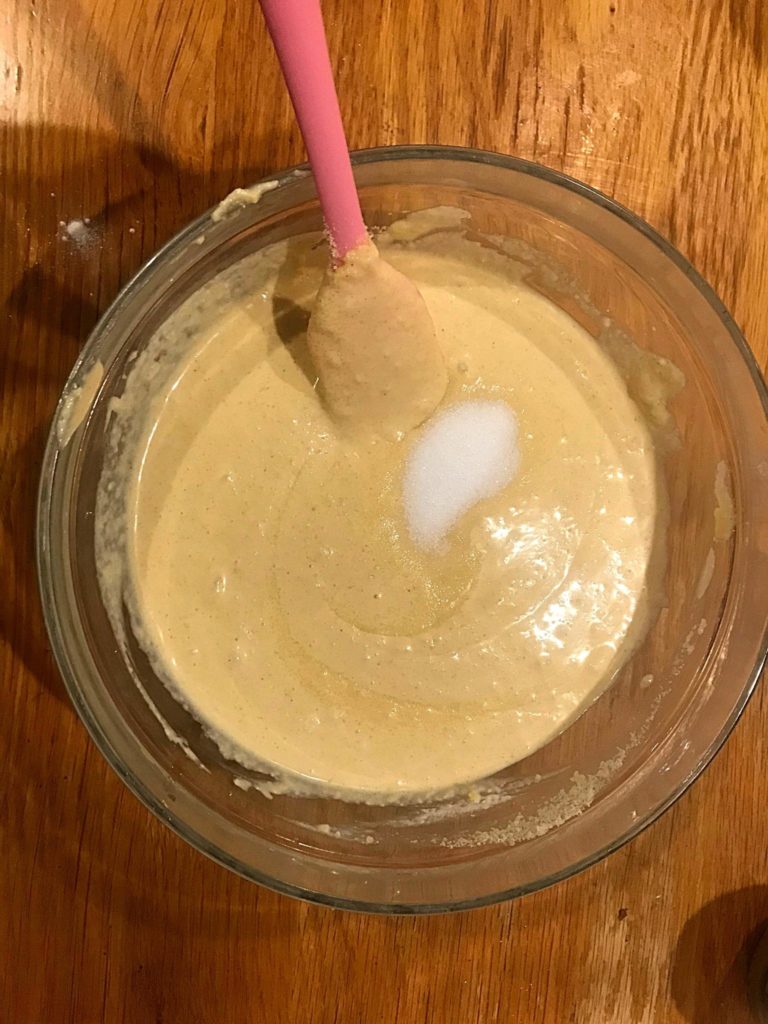
Step 7- Add the baking powder and check
Add the baking powder and mix until combined.
Once all the ingredients are included, try picking up a small amount of the mixture with a spatula/spoon into the bowl to check that it is not very liquid. If it all runs off the spatula/ spoon, add a bit more almond flour and butter, then mix again.
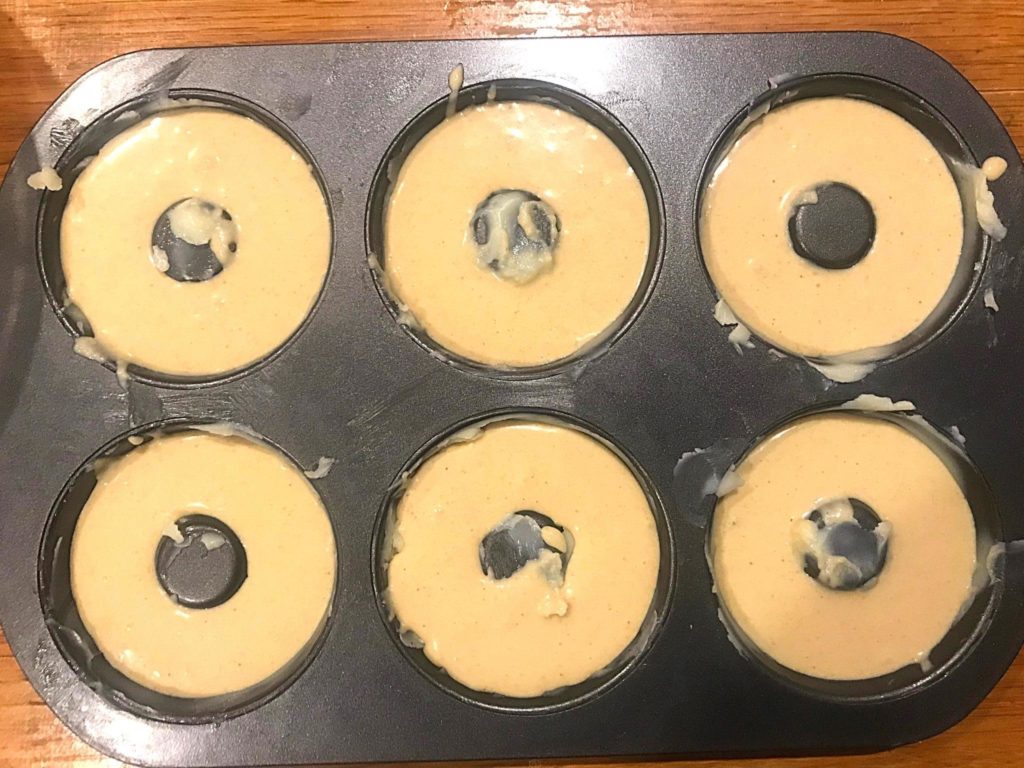
Step 8- Pour the mixture into the baking pan and place them in the oven.
Pour the dough into the baking pan donut holes. You can use a tablespoon, or if you are brave enough, you can use a small jar.
Don’t fill the cavities too much as the donuts will rise in the oven. Once the baking tray is ready, place it in the oven, and it is baking time!
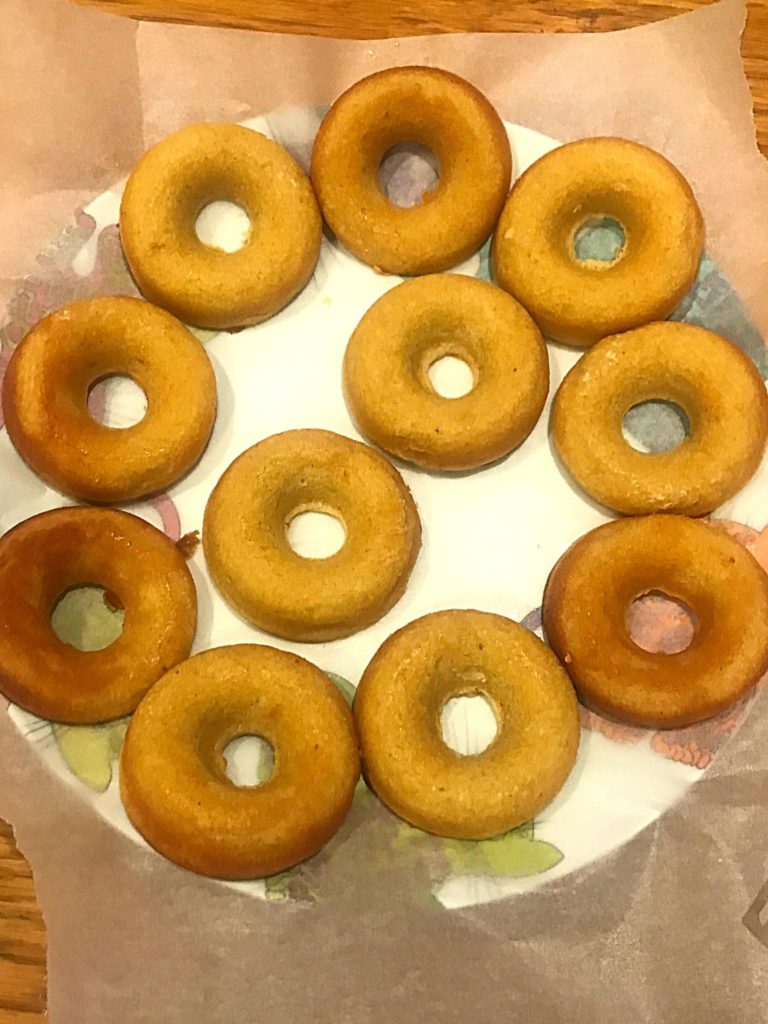
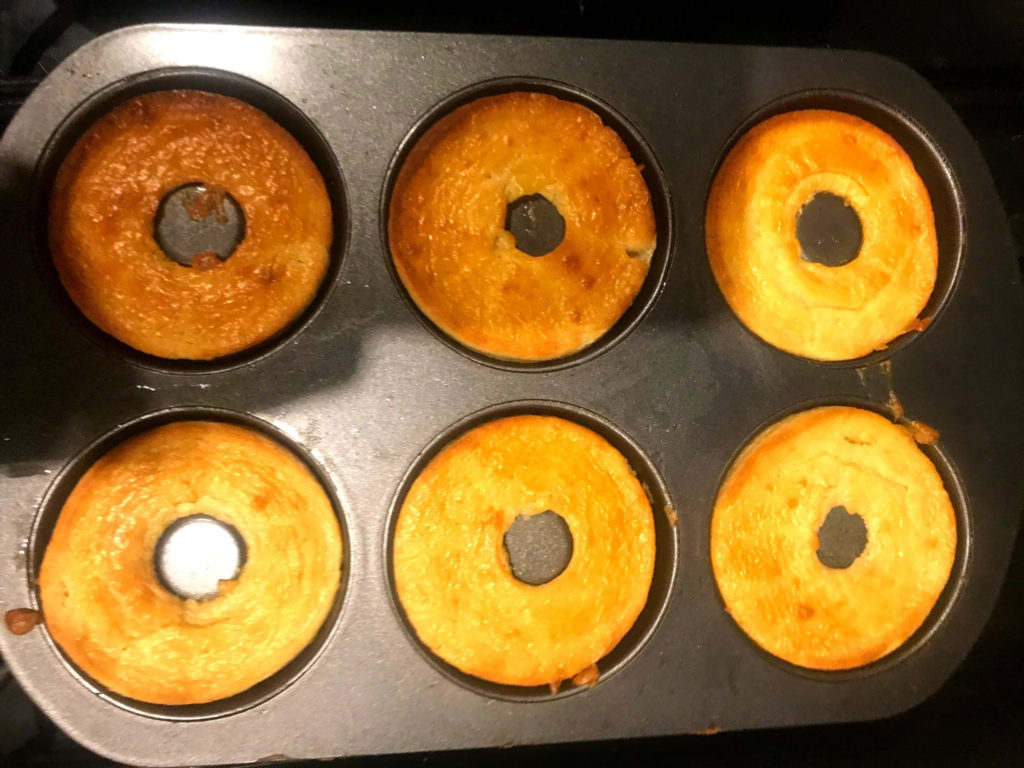
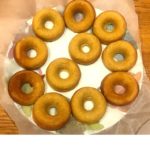
Step 9- Leave the donuts to cool in the baking pan
Once you’ve baked the donuts, leave them to cool on a plate.
Put a oven paper sheet
For the Glazing
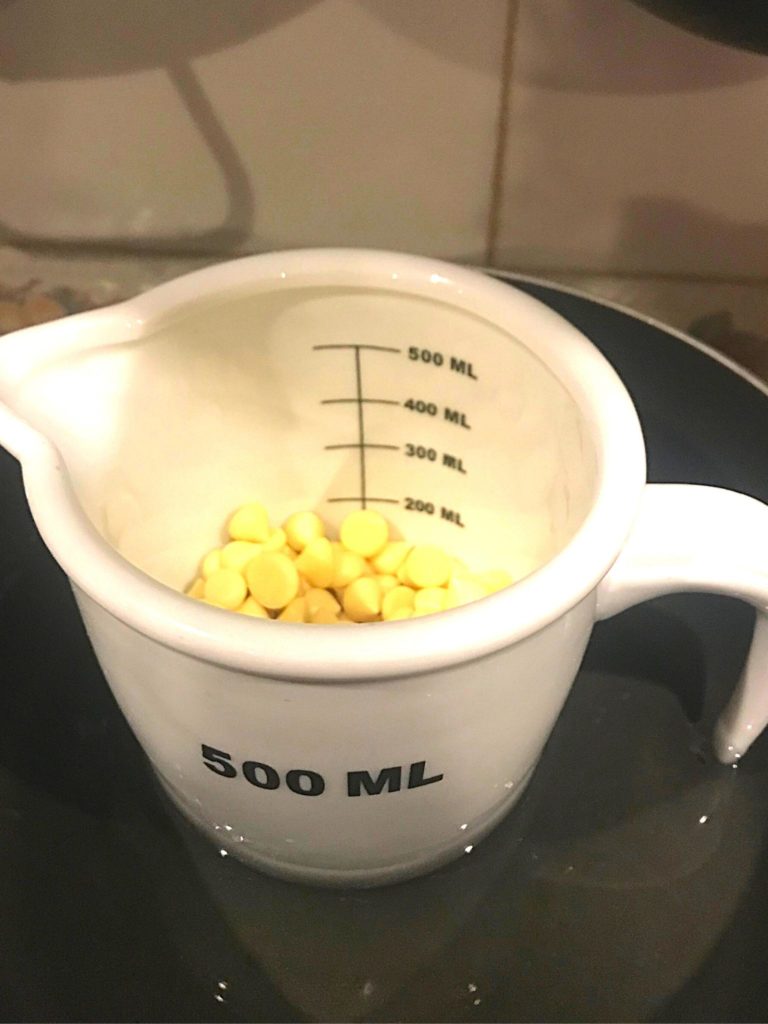
Step 10 Melt the Cocoa Butter
Melt the cocoa butter using a water bath. This can be done by placing the cocoa butter in a jug then heating in a pan with water.
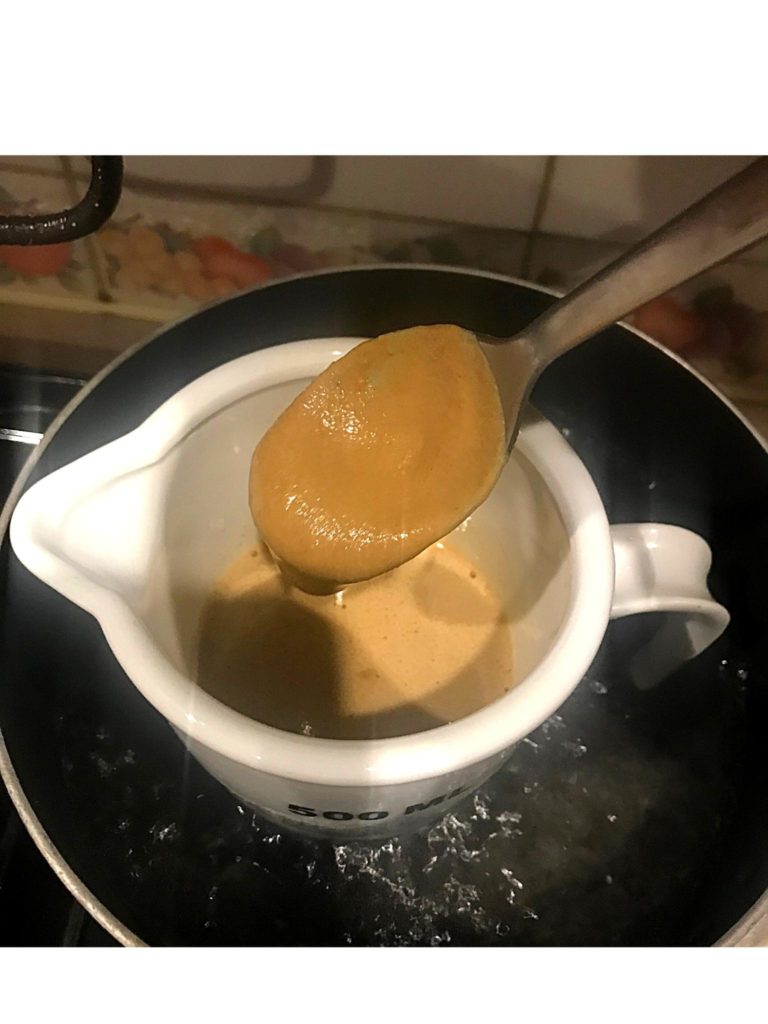
Step 11 – Add unsweetened chocolate
Add to the cocoa butter a couple of unsweetened chocolate buttons, be careful, if you add too much the glazing will have a bitter taste.
Cook in a water bath until melted, stirring occasionally.

Step 12 – Add a tablespoon of tahini paste
Once everything is melted add a tablespoon of tahini paste and stir in until combined.
The tahini paste will help to neutralise the bitterness of the unsweetened chocolate and is healthier than almost any kind of sweetener.
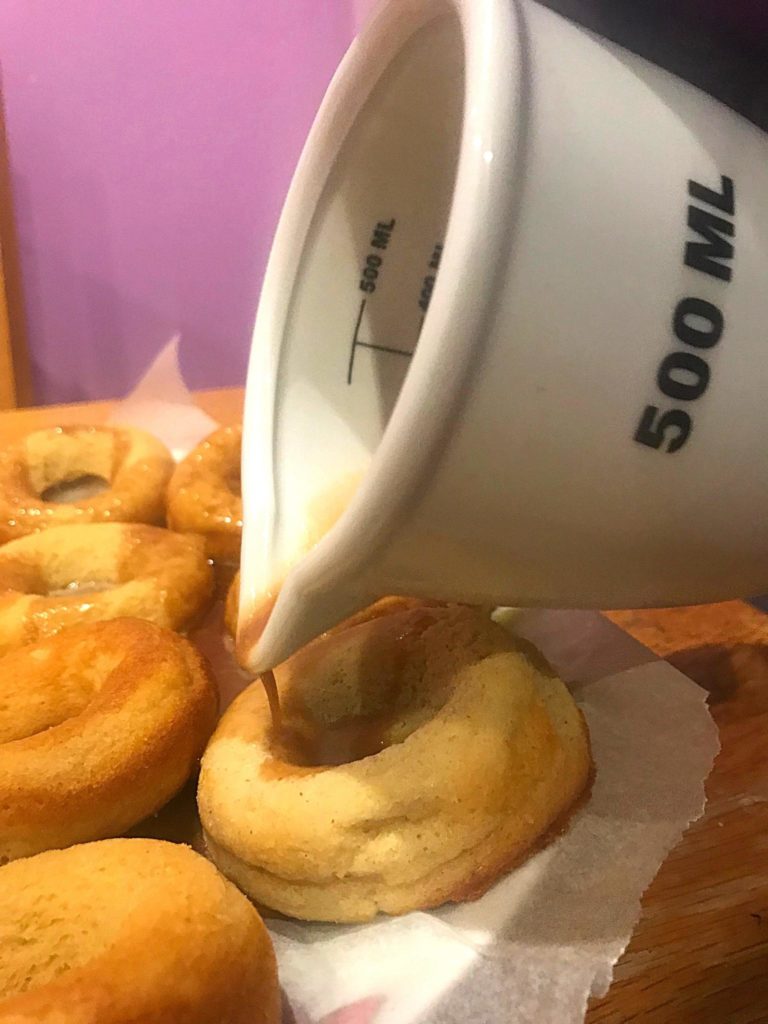
Step 13 – Glaze the donuts
You should use the mixture as soon as it is ready as it will solidify, especially if the room is cold.
On a big plate or tray I will place a piece of baking paper so the donuts won’t be attached to the plate once they are cold. Remember that the main ingredient of the glazing is cocoa mass that will solidify and stick surface
Spread mixture over the donuts. If you want extra thick glazing then doing it in layers (as you would coats of paint) can be effective.
Finishing Up
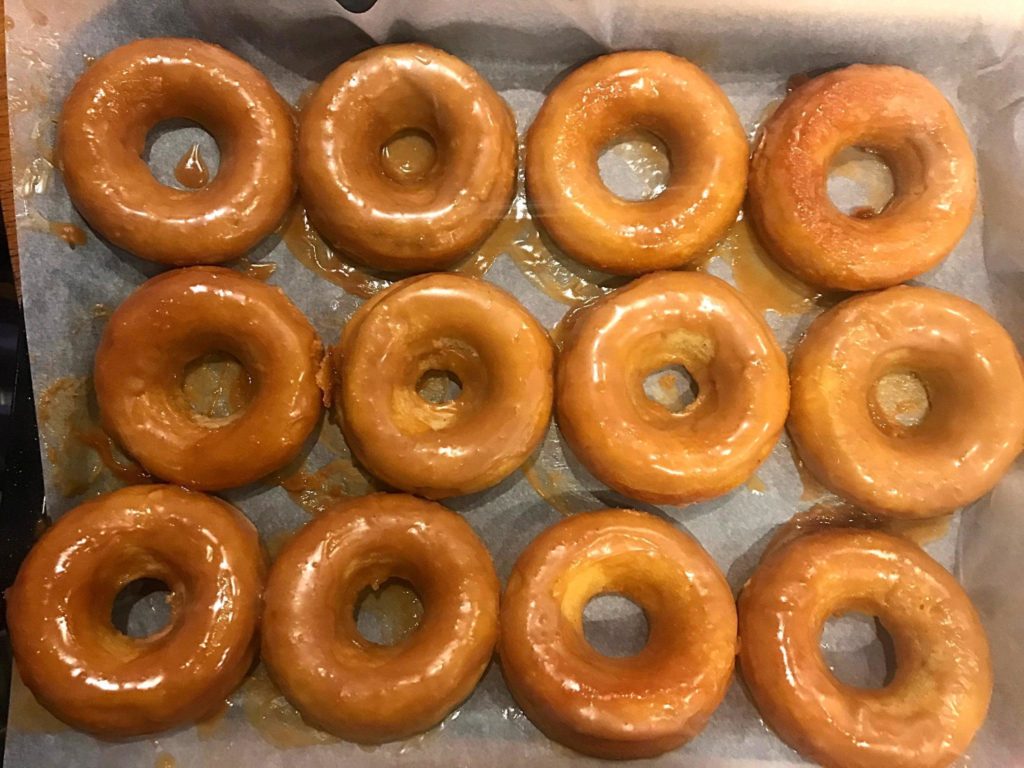
Step 15 Place the donuts on a tray and put them in the fridge.
I usually do the glazing on a big plate, and then I put them on a larger tray to help prevent the donuts sticking to the glazing plate.
Put them in the fridge for at least one hour. The donuts will be firm and the glazing will be solid.
Ready to eat!
Can I freeze the donuts?
Once they are ready you can keep them in the fridge for upto 4 days.
If you have baked a large batch you can put them in a zip frozen bag and put them in the freezer. To avoid them sticking together, wrap them individually with kitchen foil. They should last up to 3 months in the freezer without a significant deterioration in quality.
Cookware used
Donut baking pan: A dedicated donut baking pan is ideal. You can use a traditional muffin pan, but they aren’t donuts if they don’t have a hole in the middle!
Large glass bowl: I have used a plastic bowl for this recipe before, and I find I get better results with glass; it has a much firmer surface, making it easier to manage.
Silicone Spatula: I am a huge fan of silicone spatulas. They are easier to clean than wooden spoons and much easier to wipe the bowl to make the most of the dough.
Ceramic measuring jug: A heat-resistant ceramic measuring jug doubles up as a cooking vessel–reducing clean-up afterward!
Saucepan: Ideal for water baths.
Different fillings for your donuts:
If you prefer to fill your donuts instead of glazing, once they are baked and have cooled down, place in the fridge for at least one hour (check firmness before cutting), then cut the donut transversely (sideways). Ready to fill!
There are a few options that you can try:
Keto Filling options:
Raspberries. You can fill them with fresh raspberries. Just mash a few raspberries in a bowl and add a pinch of sweetener ( stevia or erythritol) if they are not sweet enough for you.
Frozen raspberries can also work well. In face once warmed up they are easier to mash.
Whipped Cream makes for a nice filling on its own, or with raspberries.
Nut butter: Macadamia nut butter is the most keto-friendly, but a small amount of almond nut butter can also work.
For the whipped cream and nut butter, if buying in a store, make sure to check there is no added sugar. Alternatively, whip the cream yourself or blend the nut butter.
Non Keto options
Non-Keto options can work well when not everyone in the household follows the keto diet. This way, you cook one batch of donuts for everyone!
Strawberries and honey: spread a thin layer of honey and then place some thinly sliced strawberries.
Hazelnut chocolate spread: Absolutely delicious! There are even sugar-free variations
Over to You
This recipe is ideal for making a batch of donuts the whole family can enjoy, including those on the keto diet.
With the different filling glazing options, you can eat these donuts for breakfast, as a snack, or even a dessert.
PrintKeto Donuts
Take advantage of this fantastic keto recipe and enjoy a healthier version of donuts. Definitely, an option to try you are in a low carbohydrate diet but, also, if you are trying to avoid conventional flour and sugar.
- Prep Time: 15 minutes
- Cook Time: 13 minutes
- Total Time: 28 minutes
- Yield: 16-18 donuts
- Cuisine: American
- Diet: Gluten Free
Ingredients
For Donuts
-
150 gr Almond Flour
-
110gr butter
-
300gr double cream
-
30 gr erythritol
-
1 tsp baking powder
-
1 tsp vanilla extract
-
1 tsp tahini paste
-
A pinch of pink salt
For Glazing
-
200 gr of cocoa butter
-
2-3 buttons of unsweetened chocolate
-
1 tbsp of tahini.
Instructions
For the Dough
Step 1- Grease the baking tray
Grease the tray generously, covering the surfaces where the dough is going, especially around the center.
Set aside until needed.
Step 2- Whisk the egg white in a large glass bowl
Separate the egg white from the yolk, add a pinch of salt (my favourite is Himalayan pink salt), and whisk until stiff.
Step 3- Add the yolks
Add the yolks and whisk them until combined.
Step 4- Add the double cream and the vanilla extract.
Add the double cream and whisk until combined, then add the vanilla extract and repeat the process.
Step 5- Add the melted butter
Melt the butter in a pan on low heat. Mix in the melted butter with the cream and eggs.
Step 6- Add the Almond flour and erythritol
Add the Almond flour and keep stirring until combined.
Add the erythritol and combine.
Step 7- Add the baking powder and check
Add the baking powder and mix until combined.
Step 8- Pour the mixture into the baking pan and place them in the oven.
Pour the dough into the baking pan donut holes. You can use a tablespoon, or if you are brave enough, you can use a small jar.
Once the baking tray is ready, place it in the oven, and it is baking time!
Step 9- Leave the donuts to cool in the baking pan
Once you’ve baked the donuts, leave them to cool on a plate.
Put a oven paper sheet
For the Glazing
Step 10 Melt the Cocoa Butter
Melt the cocoa butter using a water bath.
Step 11 – Add unsweetened chocolate
Add to the cocoa butter a couple of unsweetened chocolate buttons, be careful, if you add too much the glazing will have a bitter taste.
Cook in a water bath until melted, stirring occasionally.
Step 12 – Add a tablespoon of tahini paste
Once everything is melted add a tablespoon of tahini paste and stir in until combined.
Step 13 – Glaze the donuts
You should use the mixture as soon as it is ready as it will solidify, especially if the room is cold.
Spread mixture over the donuts. If you want extra thick glazing then doing it in layers (as you would coats of paint) can be effective.
Finishing Up
Step 15 Place the donuts on a tray and put them in the fridge.
Put them in the fridge for at least one hour. The donuts will be firm and the glazing will be solid.
Notes
Nutrition Info is per donut assuming a yield of 16 donuts.
Nutrition
- Serving Size: 50 g
- Calories: 259 kCal
- Sugar: 0.58 g
- Sodium: 81 mg
- Fat: 25.2 g
- Saturated Fat: 15 g
- Trans Fat: 0.2 g
- Carbohydrates: 9.4 g
- Fiber: 1.3 g
- Protein: 2 g
- Cholesterol: 38 mg


